Texturing and adding dirtyness

Version française en dessous. hi, For the last few week, I’ve mainly done some modeling trying to add as much detail as I could so we can use the models in the various close-up shots we have on the tracks. I had to model various little objects to “populate” the scene. I also started the […]
Version française en dessous.

hi,

tracks texturedFor the last few week, I’ve mainly done some modeling trying to add as much detail as I could so we can use the models in the various close-up shots we have on the tracks. I had to model various little objects to “populate” the scene. I also started the first texturing tests for all our various models. Until now, we’ve mainly modeled objects but we only have a few textures and materials because we were waiting to see how blender internal is going to evolve with project Durian. We were especially expecting to use the ‘material refactor’ which would allow us to have better shading. Unfortunately, with Brecht’s departure and all the other work on 2.5, the project seems to be stopped for the moment…

In this post, I’ll try to explain how I textured the concrete support of the tracks using material nodes.

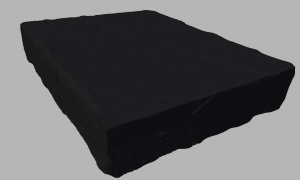
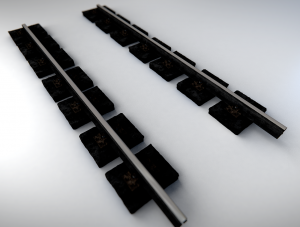
The basic idea for this model is to have old and damaged concrete blocks, covered in oil. I started sculpting some cracks, details and broken parts. Here is the model before starting texturing :

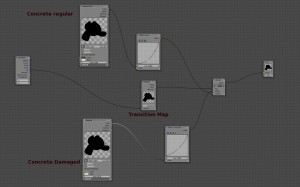
The next step was creating two basic materials, one for the damaged parts and one for the regular concrete. i tried to use procedural textures as much as possible to avoid resolution problems. Then I painted a texture to tell blender which part of the model receives each material. Finally I mix everything in the node editor :

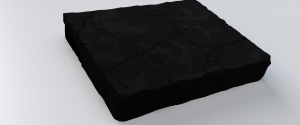
So far my concrete block looks like this :

It’s not bad but it’s not really realist. The next step consists of adding all the oil splatters. As I have two different materials, it’s easier to add these splatters using nodes. I’ve used an overlay mix to composite my generic oil map over my base material. By using the ‘mapping’ node, I could use the same map several times and play with scaling and rotation values to add variation.

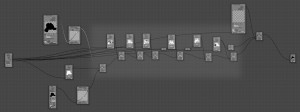
Here is the final node setup for the concrete material :

And voila! this is a quick method for adding dirt to a material without having to paint a texture in gimp!

French version :

tracks texturedCes dernières semaines, j’ai principalement fait du modeling pour le projet en essayant de détailler un maximum pour pouvoir utiliser les modèles dans les nombreux plans où l’action se situe sur les rails du métro. Il m’a fallu modéliser pas mal de petits objets divers pour ‘peupler’ la scène. Mais j’ai surtout commencé à faire les premiers tests de textures pour les différents modèles. En effet jusqu’ici nous avons surtout des objets modélisés mais très peu de textures ou de matériaux car nous attendions de voir comment le moteur de rendu de blender allait évoluer avec le projet Durian et notamment nous attendions de voir si nous pourrions utiliser le fameux “material refactor” qui nous permettrait d’avoir un shading bien plus réaliste que ce que nous avons actuellement dans blender. Malheureusement, avec le départ de Bretch et la sortie de la 2.5, le projet semble être remis aux calendes grecques…

Dans ce post je vais détailler comment j’ai texturé la base des rails en utilisant et en abusant des nodes !

L’ idée pour ce modèle est d’avoir du vieux béton abimé et couvert d’huile. J’ai donc commencé par sculpter les détails, par ajouter des craquelures et par ‘casser’ un peu le modèle. Voici à quoi il ressemble avant de commencer le texturing :

La première étape a été de créer deux matériaux assez basiques, un pour les parties abimées et un autre pour les parties en meilleur état. J’ai essayé d’utiliser au maximum des textures procédurales, histoire de ne pas avoir de problèmes de résolution. Ensuite j’ai peint une texture pour déterminer quelle partie du modèle recevra quel matériau. Et enfin grâce aux nodes j’ai mixé le tout.
Et voici à quoi ressemble mon bloc de béton à cet instant :

C’est pas mal, mais pas franchement réaliste. L’étape suivante consiste donc à ajouter de nombreuses taches d’huiles qui vont salir un peu tout ça.  comme j’utilise deux matériaux différents, le plus simple est de rajouter ces taches d’huiles via les nodes. J’ai donc utilisé une map générique avec des taches d’huile que j’ai superposées à mon matériau de base. En utilisant le nÅ“ud “mapping”, on peut utiliser la même map plusieurs fois en changeant sa rotation ou son échelle…De cette façon on ne voit pas la map se répéter et le résultat est bien plus réaliste :

Et voila le setup nodal final, vous pouvez voir dans la zone légèrement sur-éclairée toutes les couches nécessaires pour ajouter les taches d’huiles  :
Et voila, grâce à cette méthode, on peut très facilement salir ou vieillir un objet sans avoir a passer par Gimp!

Happy blending !

Going to TOSMI, Sofia Bulgaria

Hi folks, Tube will be on slight slowdown the next couple of weeks, as the local team goes on various hiatus(es? ii? hmmm) . I’ll be in Sofia Bulgaria, teaching with some standup talented Blenderheads at TOSMI (Training in Open Source Multimedia Instruments – in a word: Blender) sponsered/ ran by interspace. Becky is taking […]

Hi folks,

Tube will be on slight slowdown the next couple of weeks, as the local team goes on various hiatus(es? ii? hmmm) . I’ll be in Sofia Bulgaria, teaching with some standup talented Blenderheads at TOSMI (Training in Open Source Multimedia Instruments – in a word: Blender) sponsered/ ran by interspace.

Becky is taking a week break from drawing- right now we’re four shots short of our summer goal of finishing a draft of the new animatic- and visiting friends in NYC. Fateh, Josh and Henri are vacationing in Boston, Block Island, and NYC for a few days, then back to the studio.

I’ll be still working on Tube part time, via IRC , email and Helga. Expect some rigging goodies soon!

Introducing Smooth Tools – better control for smooth operators

Blender only has one choice of smooth algorithm which can be a bit frustrating at times.  Blender’s smooth can limited by the world X,Y and Z axes which is great, but it would be better if you could also constrain smoothing by object local axes or transform orientations.  What about if you could also mask […]

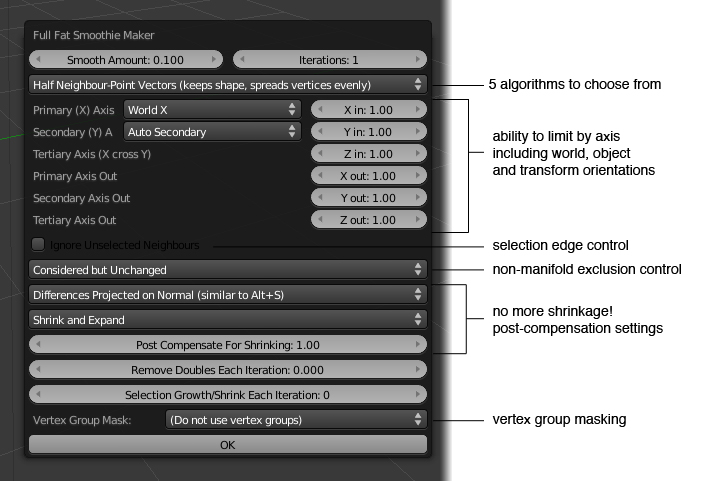
Blender only has one choice of smooth algorithm which can be a bit frustrating at times.  Blender’s smooth can limited by the world X,Y and Z axes which is great, but it would be better if you could also constrain smoothing by object local axes or transform orientations.  What about if you could also mask smoothing by vertex groups, or stop the shrinkage effect by using algorithms which don’t shrink objects or automatically shrink/flatten each vertex to retain the object’s volume, or even if you could change the way smoothing handles non-manifold edges and get smooth to leave them be or ignore them completely?  How about the edges of the selection – blender currently pretends that anything which isn’t selected doesn’t exist, but what if you wanted to take account for the unselected vertices but not actually change their position?  All of these were things which were bugging me last week when I was modeling the smooth curved body panels of the train in ‘tube’.  I put my mind to it and coded a new add-on for blender which provides much more advanced options for all you smooth operators out there.  Introducing the “Full Fat Smoothie Maker”!

DOWNLOAD v0.1

The Full Fat Smoothie Maker

The Full Fat Smoothie Maker

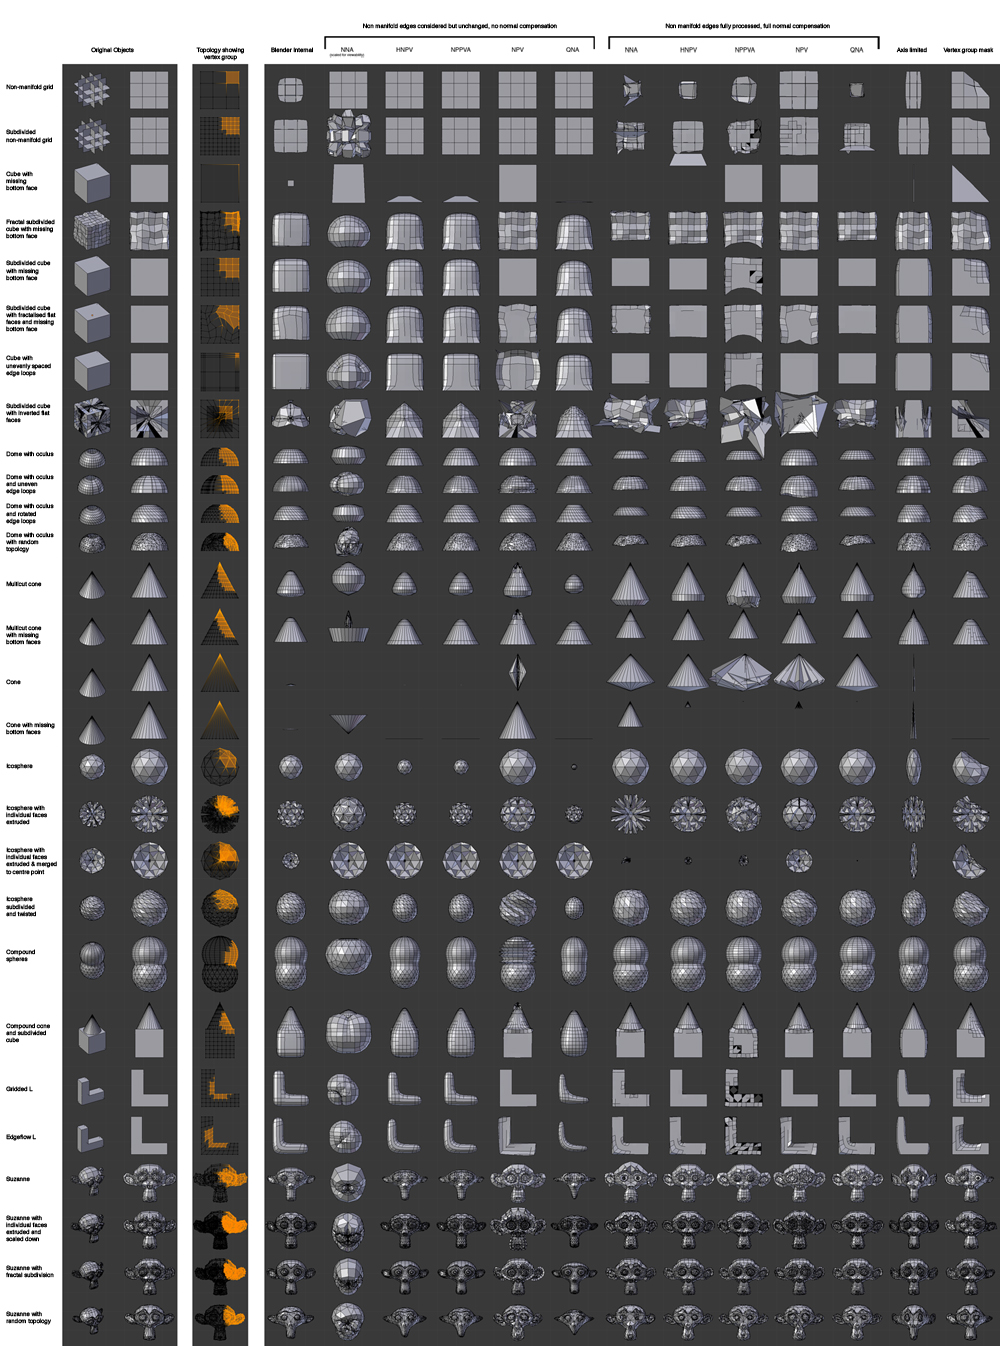
All these options might be a bit confusing to the first time user, and a lot of getting to grips with the tool is just experimenting.  There are well over 1000 ways to combine the basic choices!  I produced a quick reference chart which shows how the different algorithms handle some difficult test objects which I created.  A high-res version of this is in the zip download.

As always let me know if you find any bugs in the comments and happy blending!

Gilgamesh Rigging

Time to Rig Our character concept art has been finaled for a while (expect a post with pretty pictures soon). All I really need to know is where the joints and outlines are, which I can get from the concepts, so it is at least a good time to begin rigging. My last production character […]

Time to Rig
Our character concept art has been finaled for a while (expect a post with pretty pictures soon). All I really need to know is where the joints and outlines are, which I can get from the concepts, so it is at least a good time to begin rigging.
My last production character rigs have all been in Blender 2.4x, examples can be seen online in the Mancandy rig and the rigs I did for CNIPA ( Suzanne Award winning entry by Spark Digital Entertainment). These rigs are ‘old’- there’s been progress/new ideas in the world of rigging, and Blender 2.5 is designed to enable (some) of these techniques.
Research
For research I studied two great blender rigs: Sintel by Nathan Vegdahl and Blenrig by Juan Pablo Bouza. I also looked at the features of Anzovin Setup machine rig for Maya, and had a great time looking at rigging PDFs, books, and demoreels. The basics are all the same it seems, but some features I had considered ‘optional’ are now ‘required’, and I found some awesome hints for more realism/detail in rigging, such as proceduralism, skin sliding and more. As I implement some of these I’ll blog the techniques.
Jarred and I conducted some rigging and python experiments, such as Pivot Switching, space Switching, twisting Spline IK, Mouth rigging, and more. I also made the copy menu addon for Blender because copying visual transformations was a good step in automating rigs, and taught me about the various available transformation matrixes for Blender bones.
Dan Finnegan, a previous Maya user, learned enough Blender to do cloth simulation tests in controlled situations. As a result we are quite nervous about using Blender’s cloth in production! We’ll opt probably for a rigged solution, or a cloth solution that only does part of the work and requires rigging for the rest. Our cloth requirements are quite extensive based on the concept, but not as bad as some of our early clothing designs. Thanks to work done by the team at project durian, we can at least use cloth sims in linked characters.
Results

I had great help from JPBouza, who customized a Blenrig model and rig to Gilgamesh proportions from the Zepam mesh – after deliberation, I will do a from scratch rig for our main character, while borrowing some features from this rig, the most important in my opinion is the awesome mesh deformation cage he has made that gets excellent results, which he adapted to Gilga’s proportions, so I’ll probably use that with no modification. I’ve got a list of ‘must have’ features, a good idea of how the overall rig should look like, and a list of ‘nice to have’ features. Some ‘advanced’ techniques are surprisingly easy to do, while some (ahem, skin sliding) will take more work to find workable.
Requirements
We need to start animation in September, so the first thing is deadlines: we need the main body controls locked down by then. No time to wait for a final character model, so I work on a proxy I made for rigging.
A small list of needed features on the very basic proxy:

  • IK/FK Blending on the arms and legs
  • Locked Elbows for the arms
  • Locked Knees for the legs
  • Adjustable automatic shoulder rotation
  • Adjustable rotation isolation for arms in FK
  • Seamless IK/FK blending for legs and arms
  • FK control chain for Torso
  • Adjustable rotation isolation for torso controls in FK
  • IK controls for Torso
  • FK/IK switch for Torso
  • Seamless Pivot Switching for Torso
  • Toe-Midfoot-Heel Pivot for Feet
  • Neck controls that allow nice motion/deformation of Gilgamesh’s very unique neck and shoulders
  • Eye direction and tracking controls
  • Rule tagged bones for easy adjustment and robustness of the rig (with rigamarule)
  • Optional stretch for arms, legs and torso

This is not the final list, is enough to get animation started, but not finaled. More features will happen, some on the proxy, some after we get the final character model done, such as:

  • Facial animation
  • Hand and finger animation
  • Deformation tweaks
  • Bend tweaks
  • Cloth and hair
  • Procedural shakes and vibration
  • Direct knee and elbow control

Progress

We’ve got the basic FK controls for the Torso, IK and FK for the arms and legs, Auto shoulder rotation tweakable, IK FK blending working on arms and legs, seamless (no jump) blending working 90% on the arms (both ways) and working on the legs going from IK to FK. An initial control UI exists, ready for tweaks, and we have rigamarule ported to 2.5, lacking only nice UI so we can start tagging bones (Thanks Daf and Josh)

Update on Copy Menu Script

Just a quickie post; the copy menu script is now in bf_extensions SVN on blender.org. Some updates: It can now copy Vertex weights by index and it can also copy mass ( a request on this log) thanks to Fabian Fricke. I’ve also updated it to work with current SVN, which means… yes, it won’t […]

Just a quickie post; the copy menu script is now in bf_extensions SVN on blender.org. Some updates: It can now copy Vertex weights by index and it can also copy mass ( a request on this log) thanks to Fabian Fricke. I’ve also updated it to work with current SVN, which means… yes, it won’t work with Blender 2.53 beta anymore. It’s a fast paced Blender we live in! I’ll try to make it work in both soon, but no promises.

©URCHIN 2015