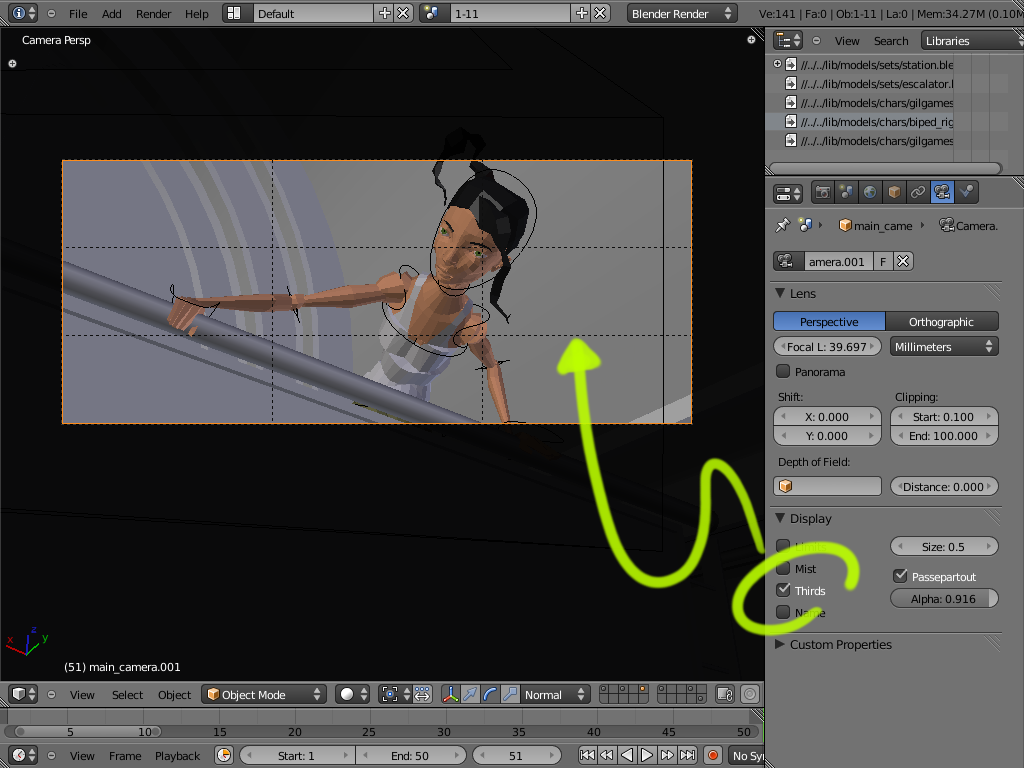
Display Thirds for Composition in Blender Camera

I’ve often wanted to have lines for ‘rule of thirds’ in the Blender Camera as a composition aid – I’ve got countless blend files with little no-face meshes parented to cameras (that have to be moved or scaled whenever I change the camera view angle). Granted this problem could be solved with a driver (That […]

I’ve often wanted to have lines for ‘rule of thirds’ in the Blender Camera as a composition aid – I’ve got countless blend files with little no-face meshes parented to cameras (that have to be moved or scaled whenever I change the camera view angle). Granted this problem could be solved with a driver (That might not update – driving on camera angle is not dependable yet), but I got tired of ad-hoc solutions.

I don’t use the Title safe option that much or at all, so with the help of a trusty text editor (gedit in my case) I hacked a couple of files and now I have ‘Thirds’ instead of title safe for the camera. The internal property is still the same, it just displays differently, so no messing with RNA happened.

If you want the same functionality and are comfortable building blender/applying patches, you can get it here . Usual disclaimers about baby eating and such apply.

Free/Open Source software is nice, isn’t it?

Total Radness

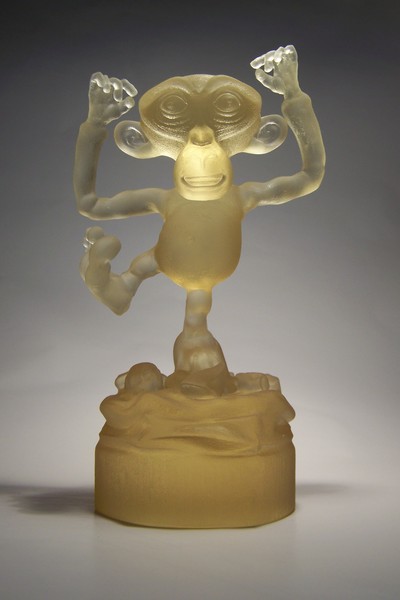
Bassam will soon be reporting on the Blender Conference, and we have a number of cool announcements coming up — but first I want to congratulate our own Jarred de Beer for taking this year’s Suzanne Award for Character Animation! Jarred was a visiting animator/TD on the Tube project for nearly a year, and is […]

Bassam will soon be reporting on the Blender Conference, and we have a number of cool announcements coming up — but first I want to congratulate our own Jarred de Beer for taking this year’s Suzanne Award for Character Animation!

Jarred was a visiting animator/TD on the Tube project for nearly a year, and is now part of our distributed team working from his native South Africa. During his time here, Jarred attended SIGGRAPH; participated in a 48 Hour Film Festival short organized by crewmate Jason Van Gumster; and with Pablo Lizardo, also did a mini-project for Sintel  (in honor of which we privately call the Durian movie, “Backpack”).

Though it would have been a nice personal touch, Bassam couldn’t accept on his behalf because, having pulled the usual all-nighter to Make Epic the awards presentation — this time with CG conceived by Andy Goralczyk — he had to be up in the projection room pressing the space key.

Check it out, yo: Grey Justice takes on the High Bar.


Gilgamesh Rig Preview Video

The end of this week should see the initial rig in the hands of animators, and I need a quick intro video to show them what’s in store. I whipped up a quick screencap of (most) of what we have so far. The rig is far from complete – I won’t do fingers and face […]

The end of this week should see the initial rig in the hands of animators, and I need a quick intro video to show them what’s in store. I whipped up a quick screencap of (most) of what we have so far. The rig is far from complete – I won’t do fingers and face until the model is finaled, too much can change in those small details. The rig itself is quite ‘smart’ as Rigamarule has been ported by myself, Daf and Josh to Blender 2.5. As a result, moving a joint can auto-update the rig easily, and I can add bones and then ‘place’ them using rules rather than manual transforms. More on that later, onwards to the actual features for animators.
I’ve hopped on the 2.5 rig-ui-in-the-view3D-properties-region bandwagon so popular among Blender riggers these days, though more could be done there.
Nice things that 2.5 enabled is seamless Pivot switching (via Python, rather than the constraint), and not shown in this video, seamless IK/FK switching (without jumping), better drivers, and myriad small features. I’m still waffling on exactly how certain features will look/feel/work, so this is a work in progress, but it should stabilize by Wednesday (time for animation tests)
On to the video:

For a higher resolution version, download this file.

Modeling the Train, with Automatic Baking

In between bouts of python coding I’ve been working on the model for the train and carriages. The model is asymmetric and modular so in theory loads of variations could be created by combining bits from the two models shown below.  The two ends of each train are different, as are the pantographs and all […]

In between bouts of python coding I’ve been working on the model for the train and carriages. The model is asymmetric and modular so in theory loads of variations could be created by combining bits from the two models shown below.  The two ends of each train are different, as are the pantographs and all of the side panels.  The design is based on a mix of old NYC subway cars and Soviet-era Eastern European engines.  I built the model on top of an early design for the undercarriage which had been modeled by Jean-Sébastien Guillemette and Jarred de Beer.
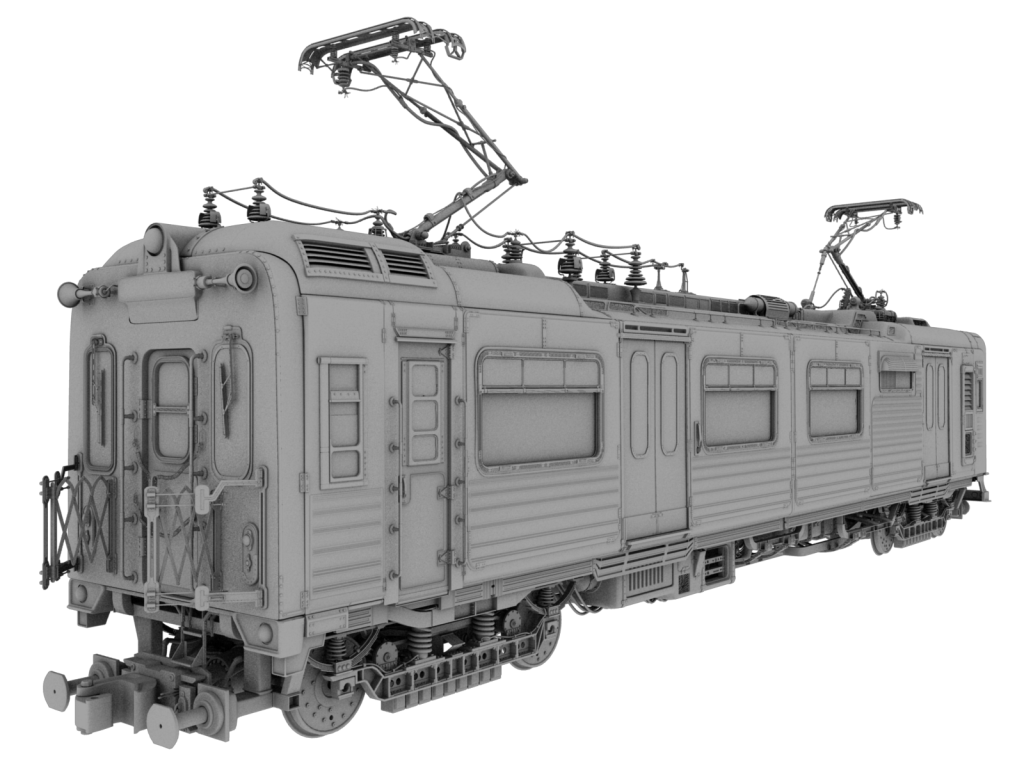
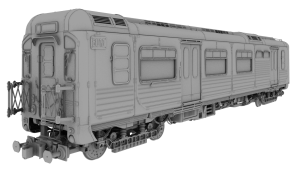
The model for the train is currently very high poly as it will probably be used in a few close-up shots (these renders are all geometry – no texture normal/bump maps!).  There’s a bit of work still left to do (naming 3000 objects and parenting them in a nice ordered heirarchy for one!) and making a low poly version, not to mention further tweaking of the design and rigging the moving parts!  To make the low poly version lots of the objects can simply be moved to a hidden layer (or excluded from the ‘HI’ group – we use group instances to bring models into scene files), but many of the meshes need to be split up into smaller parts so that the smaller parts can be excluded from the low poly renders – for example we need to move the rivets out of the body panel meshes as they will be so small in many of the long shots they won’t be noticeable – even at 2K!

For continuity’s sake we need to make sure the rivets are in the same place in the high and low poly versions.  To save the texture painters some time later down the pipeline I’ve written a script which goes through every object in the mesh and separates the details from the main lower poly mesh component (I can define these using vertex groups etc) and then bakes the details’ AO ‘shadow’ onto the lower poly part of the mesh and saves the texture in a maps file.  The script also intelligently names all of these textures in case links get broken up as the SVN gets reorganized over time.  For example if the script finds an object called ‘side_door’ it will split the object into ‘LOW0001side_door’ (for low poly) and ‘DET0001side_door’ (for details) and then bake out the AO to an image called ‘IMG0001side_door’ while making sure that all the meshes stay linked to save memory (rendering without any textures is already taking up over 2GB of memory).

Unlike the normal P-key behaviour, the script makes sure that separating meshes affects all the linked duplicates, not just one of them.  The numerical prefix helps identify one specific detail mesh with its corresponding specific lower poly mesh.  For example if there are 5 duplicates of ‘side_door’ (‘side_door.001’,’side_door.002’…), the first will be renamed ‘LOW0001side_door’ with its details saved in ‘DET0001side_door’, the second will be renamed ‘LOW0002side_door’ and its details saved in ‘DET0002side_door’ and so on, so future ‘tubers’ to work on the model won’t have to spend hours searching the outliner list to find the right object!  The reason the number is at the start and not the end of the name is to stop blender messing with the numbers, and to help sorting in an alphabetized list!

Fingers crossed there won’t be any surprising bugs in the script, as baking out 1000 unique meshes is likely to take some time and we haven’t written a resume function for the script yet!


Rigging Goodie: Armature Layer Names

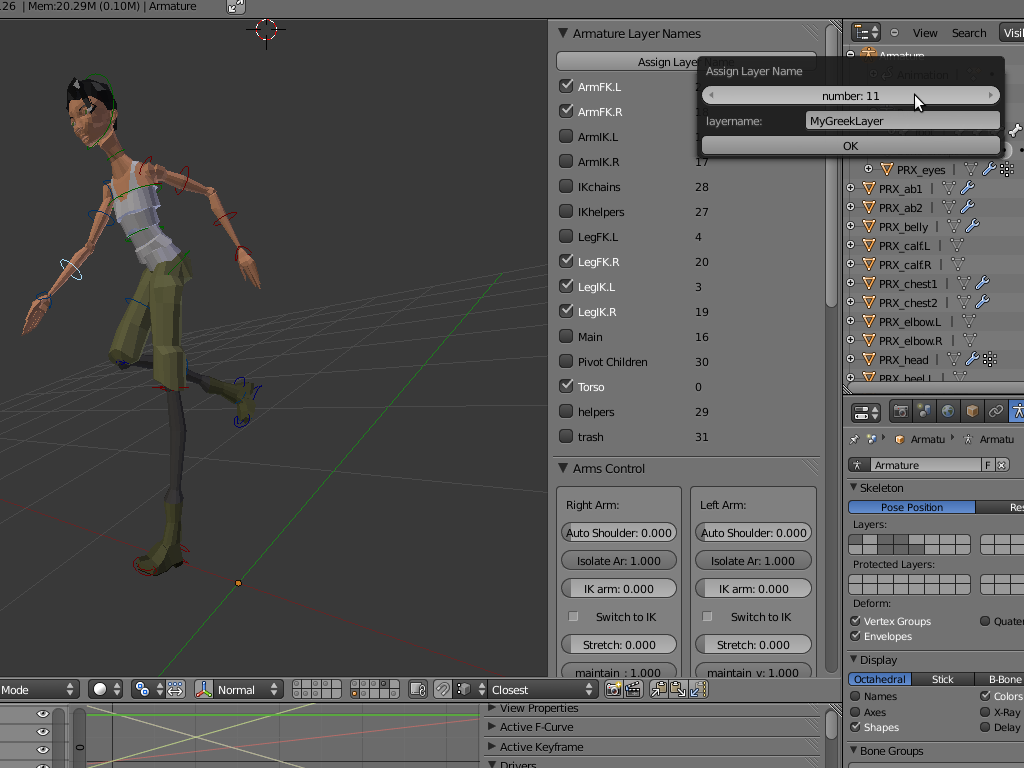
Just a small utility I’ve been using to make my life easier, a little addon that lets you assign names to layers in an armature and hide/unhide them in the 3D View Properties area. Download it here, unpack then install via the add-ons area in user preferences. Works on current SVN (and the soon-to-come beta […]

Just a small utility I’ve been using to make my life easier, a little addon that lets you assign names to layers in an armature and hide/unhide them in the 3D View Properties area. Download it here, unpack then install via the add-ons area in user preferences. Works on current SVN (and the soon-to-come beta hopefully)

There’s also a ‘hidden’ operator you can use in the 3d view (search for change bone name layer) that allows you to switch selected bones to a named layer.  It’s a bit rough, but the panel at least beats having to hunt and peck one of those 32 nondescript little buttons 🙂

This isn’t really part of the gilgamesh rig, just a utility I’ve been using while rigging. The final UI (you can see a peak of it just under the layers in the screenie) has hardcoded layer names, and only those that are relevant to animation.

©URCHIN 2015