Time to Model!

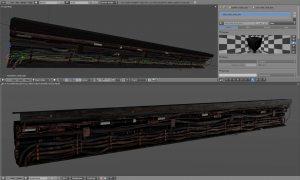
Well, after a few weeks working in the concepts and the boards for the animatic, it’s time now to do some modeling stuff, which is REALLY fun! and it give us the possibility to play a little bit more with blender 2.5. I must say that I’m really comfortable now working on it, anyway I […]

Well, after a few weeks working in the concepts and the boards for the animatic, it’s time now to do some modeling stuff, which is REALLY fun! and it give us the possibility to play a little bit more with blender 2.5. I must say that I’m really comfortable now working on it, anyway I use to save the file every big change I made into the mesh, because you know, it’s still a beta release and blender crash -very- often! :P.. we are a little bit accustomed to that ๐Ÿ™‚

Also now we are working “officially” with the render branch ๐Ÿ™‚ My English is not too good, so I’ll let the image talk by himself! ๐Ÿ˜‰

Also, for a better “sharing” issues between the members of the team, and also for scripting work, we decide to made a convention about how we have to use the layers for the props and for the sets files. Meaby it’s usefull for you too. here is:

We are also putting base materials in the objects using only procedural textures, and we are trying a new way to assign and modify materials, using a library.blend file which have the basic materials for all the files, so we just link the material and any change in the original file is updated in the other files too, nothing fantastic , but for us is kind of useful and fun!.

What else i can say! , well, Jarred is doing layout and he is also scripting a lot and Bassam is doing everything else needed for the project to keep going forward. They’re going to post soon with some massapusset (ask to Jarred about that word XD ) scripting! ๐Ÿ™‚

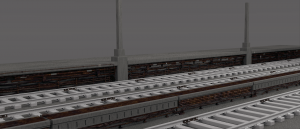
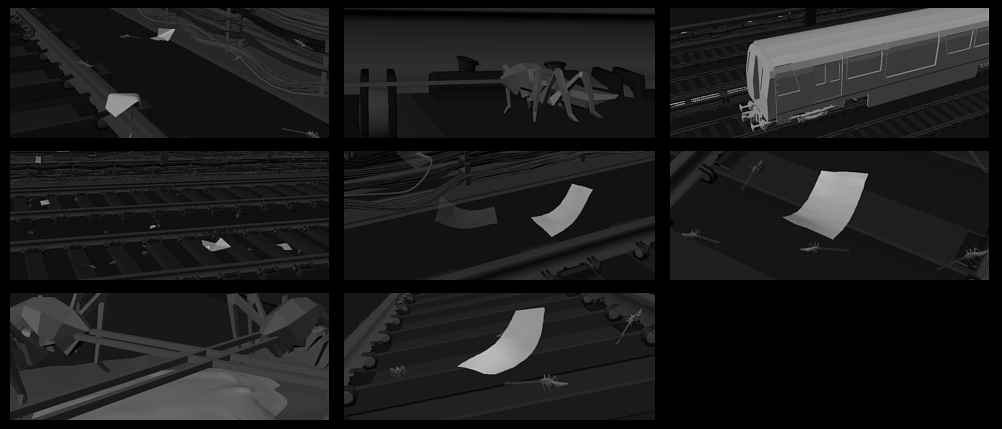
Also we start doing Layout in 3d! YEAHHH!!! ๐Ÿ˜€ , I’m not able to show you too much, but here is a little sample:

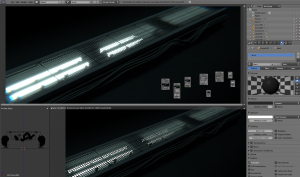
The last thing i want to show is a little test of indirect illumination with the render branch build. Just for play I start to emit light from the light tubes, and here are the results! , (non lights only meshes!)

By the way, all the materials are only for preview and the models are not “final” … we have a lot of things to do yet! Another image to test the variations in the edge of the platform and in the pedestal too. Do you see any repeated and annoying pattern? Tell me please ๐Ÿ™‚

Well that’s all for now!, keep in touch, please comment and see you soon! ๐Ÿ™‚

Bye!

– pablo

Mouth Rig Test

Welcome riggers! Before going on to the final character rig, I found it prudent to do a few small tests. I’m planning on doing a layered approach to the face rig, with some basic deformer based (armature/latice/curve/meshdeform/etc) controls for major motions on the ‘bottom’ layer, and more specific facial expressions on top. The latter will […]

Welcome riggers!

Before going on to the final character rig, I found it prudent to do a few small tests. I’m planning on doing a layered approach to the face rig, with some basic deformer based (armature/latice/curve/meshdeform/etc) controls for major motions on the ‘bottom’ layer, and more specific facial expressions on top. The latter will probably be blend shapes, but I haven’t decided completely yet.

For the jaw, I wanted the ability to rotate the jaw freely (as well as push it back and forth) where rotating down results in opening the mouth/lips, and rotating up results in squashing the lips/face, no interpenetration. I mulled a few ideas, but finally decided on combining an armature deform (this could get a replacement in the final rig) to open the jaw, and a lattice deform to squash it, blending between the two based on the jaw angle.

The final result is a bit more complicated than that; I couldn’t find an easy way to blend modifier influences, so I settled for having both modifiers always on, but blending the influence of the bones that do the deformation based on the angle of the jaw. There is a slight risk here: two non-multimodifiers in the stack on top of each other might look bad splitting the deform, but the result in this test wasn’t too bad.

I present you with a quick video capture of the result:

Download link

Keep in mind this is just a test! for a real rig, a lot of refinement would be needed to create pleasing deformations; more complex rigging than just the jaw and head for deformation, more constraints, better weight painting, more careful placement and design for the bulge lattice, correction shapes, etc. However, for a test, this is showing some promise- though I would be more comfortable if I could use multimodifiers and blend the influence of the modifiers directly.

I’ll post more tests as I go along. If anyone is remotely interested in the .blend file for such a simple thing, let me know, I’ll be happy to upload it.

Last note: If you are on a mac and cannot view the video, download XiphQT. If you are using Windows download the Ogg codecs for windows . Firefox, Opera and chrome users should be able to view the video directly in the browser (as should Safari users with XiphQT installed). If it doesn’t work, just use the download link instead.

Libre Planet!

So, we’re going to the Libre Planet meeting this weekend in Bostonร‚ย  (we being Bassam, Fateh, Pablo and Jarred.) Mainly we’ll be attending talks, working on Tube at the hackfest, helping out with the event, meeting people, catching up with friends at the event and in town, etc. We’ll see at least one regular of […]

So, we’re going to the Libre Planet meeting this weekend in Bostonร‚ย  (we being Bassam, Fateh, Pablo and Jarred.) Mainly we’ll be attending talks, working on Tube at the hackfest, helping out with the event, meeting people, catching up with friends at the event and in town, etc. We’ll see at least one regular of our irc channel in person for the first time (hey chris!) If you’re reading this, and going to the event, come say hi ๐Ÿ™‚

What we’ll likely be working on: Rigging and scripting rigs in Blender 2.5, Concepts in Gimp, Animatic in Gimp and Blender.

Oh and this is Pablo and Jarred’s first visit to Boston/Cambridge. Any tips? Things we shouldn’t miss?

Cycling to the studio

Today was the first day of the season that we cycled into the studio. It’s magnificent taking the bike path during Spring and Summer, as the area is covered in forests and farmlands, and is a very inspiring way to start the day. Well energized, we’re back at boarding for myself and Pablo, while Bassam […]

Today was the first day of the season that we cycled into the studio. It’s magnificent taking the bike path during Spring and Summer, as the area is covered in forests and farmlands, and is a very inspiring way to start the day. Well energized, we’re back at boarding for myself and Pablo, while Bassam continues with the animatic and Fateh works on the script and schedule. We leave you with some photos of the cycling route during the Summer.

Post URL
3 comments

Working with Blender, Gimp and Inkscape in OSX. Part II

Official website: http://www.inkscape.org The main issue with Inkscape is the ugly theme that came by default. There’s no too much tweaks needed for Inkscape but at least we can get almost the same look and feel of gimp — a dark and tiny theme which is Very Fine and don’t make you feel uncomfortable to […]

Official website: http://www.inkscape.org

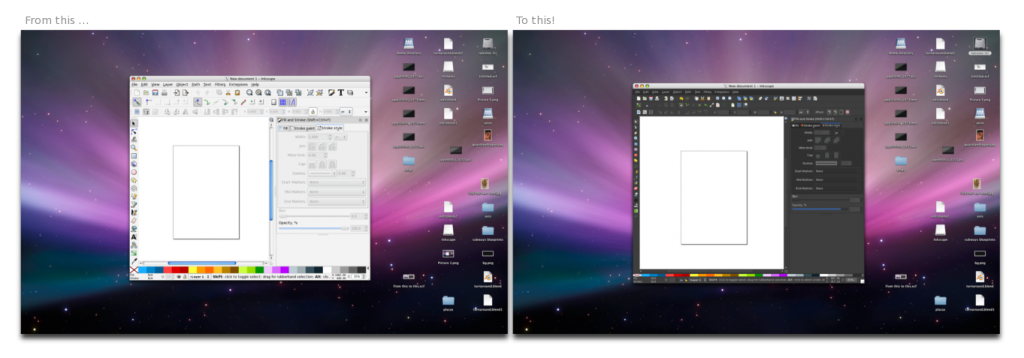
The main issue with Inkscape is the ugly theme that came by default. There’s no too much tweaks needed for Inkscape but at least we can get almost the same look and feel of gimp — a dark and tiny theme which is Very Fine and don’t make you feel uncomfortable to use it on OSX. As in the Gimp post, all these things also work in Linux and Windows so maybe you should give a try to these kind of hacks! ๐Ÿ™‚

Ugly, big and too light gtk theme:

Well, as I said recently, you cannot install a theme in Inkscape, But if you do the following you can get a nice and dark theme! ๐Ÿ™‚ Get this file ->ร‚ย Clearlooks-Quicksilver-OSX and unzip it, into a new folder called themes, into the Inkscape App folder:

OSX: /Applications/inkscape.App/Contents/Resources/themes/

ยฉURCHIN 2015