Drinking the Blenderaid

I’m a huge fan of Blenderaid, a great way to manage your blender projects. You run a small server that is capable of crunching through your project, finding all objects, dependencies, etc., then point your browser to it and get a graphical overview. You can look at individual files, see the names of objects/materials/etc., rename […]

I’m a huge fan of Blenderaid, a great way to manage your blender projects. You run a small server that is capable of crunching through your project, finding all objects, dependencies, etc., then point your browser to it and get a graphical overview. You can look at individual files, see the names of objects/materials/etc., rename them, view dependencies, fix broken links, and now check and update SVN status etc. etc., all from the comfort of your browser window. I’m using the Python 3 version, which for me necessitated installing PySVN from source, since the Ubuntu modules are Python 2 only. Other than that, I had a smooth install; I’m looking forward to continuing to use this version and further goodies in the future.

Some cool things you can do with it:

  • Find errors in your project globally without having to check each file one by one in blender- and fix them (could benefit from batch tools so you can do multiple at a time)
  • Create ‘bundles’ of files, e.g. to send to an off-site animator who doesn’t have SVN access, by quickly seeing all the dependencies of a given scene file. This can be done by hand right now, but I’m pretty sure it could be scripted fairly easily.
  • Make sure your files are up to date, track problems with SVN visually
  • Rename models/assets, find out where they get used, etc.
  • Probably a lot more 🙂

Blenderaid could change the way we work with SVN for projects – instead of checking out several gigabytes of production data, each artist need only check out exactly what they need– saving time, local disk space, bandwidth. We could use it also to have versions of assets and switch (optionally) some scenes to use newer versions or to continue working with the old.

I’m hoping to have time after tube to experiment with blenderaid in conjunction with helga, or alone, and to have server-side installation as well as the local one. This could be the key for large-scale projects in blender, big thanks to Jeroen and Monique for writing it, and I look forward to seeing how it evolves.

Quick note from Jeroen: the python2 version saves time by removing the need for additional compiling, and should work without any problem. (I was under the mistaken notion that Blenderaid’s python version had to match Blender’s).

Display Thirds for Composition in Blender Camera

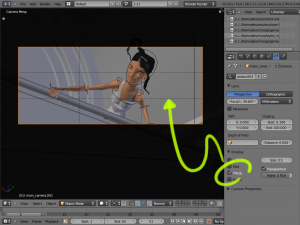
I’ve often wanted to have lines for ‘rule of thirds’ in the Blender Camera as a composition aid – I’ve got countless blend files with little no-face meshes parented to cameras (that have to be moved or scaled whenever I change the camera view angle). Granted this problem could be solved with a driver (That […]

I’ve often wanted to have lines for ‘rule of thirds’ in the Blender Camera as a composition aid – I’ve got countless blend files with little no-face meshes parented to cameras (that have to be moved or scaled whenever I change the camera view angle). Granted this problem could be solved with a driver (That might not update – driving on camera angle is not dependable yet), but I got tired of ad-hoc solutions.

I don’t use the Title safe option that much or at all, so with the help of a trusty text editor (gedit in my case) I hacked a couple of files and now I have ‘Thirds’ instead of title safe for the camera. The internal property is still the same, it just displays differently, so no messing with RNA happened.

If you want the same functionality and are comfortable building blender/applying patches, you can get it here . Usual disclaimers about baby eating and such apply.

Free/Open Source software is nice, isn’t it?

A Blender Conference by any other name would be just as sweet

As always, the conference was awesome- an intense three days of talking, listening, meeting, blending, eating the traditional conference sandwiches, drinking coffee, beer and mojitos, not-enough-sleeping, more blending, etc. After a sleepless but uneventful flight to Amsterdam I walked into the Blender Institute the day before the conference, only to have Andy pressgang recruit Pablo […]

green shoes of awsomenessAs always, the conference was awesome- an intense three days of talking, listening, meeting, blending, eating the traditional conference sandwiches, drinking coffee, beer and mojitos, not-enough-sleeping, more blending, etc.
After a sleepless but uneventful flight to Amsterdam I walked into the Blender Institute the day before the conference, only to have Andy pressgang recruit Pablo and me into making the Suzanne festival and award interstitial animations with him. We had a (very sleepy) blast working till the wee hours, and more in the next morning, and I got to go up in the projection booth once again and play the festival off my laptop, thanks to the power of totem/gstreamer and python (for making the playlist). I apologize for the one or two glitches- a couple of the videos needed to be re-encoded for smooth playback, but we somehow missed that in the studio.

[nggallery id=28]

Jeroen Bakker showed me his awesome openCL nodes in the compositor on his laptop, running 20!zoom!! times faster than the CPU equivalent. When this stuff hits it’s going to make a mini-revolution for Blender. I’m no longer a sceptic about GPU computing I guess 🙂
Wolfgang Draxinger did a fantastic job making the stereoscopic version of Elephants Dream. Great choices, hard work and technical precision- I’m blown away both by the result, which rivals the best stereo work from major studios, and by the amount of work he put into it. He’s planning Big Buck Bunny next, but in the meantime, some snaps of us removing (the unfortunately crumpled) screen after the show:IMG_3906

I met with Josh, Henri, Francesco, Jason, Jonathan, Jean Sebastian, Heather, and recruited Dolf, Tal, and perhaps Luciano, Andy and Pablo for our project. We had a meeting the second day of the conference, which gave me a chance to finally pitch the story and current animatic to the team in person, talk about where we are at in the project and assign some short-term tasks. We also had a presentation on Sunday, mainly about technical issues: rigging, though I did not demo rigamarule- turns out auto-registration of operators had somewhat broken the UI while I wasn’t looking (it’s fixed in current tube SVN). Josh showed off his work on procedural animation, and Henri demoed building scene layouts from library models using our LODing system and the landmark-snapping system created by Pablo Lizardo.

As Fateh has blogged, Tube member Jarred De Beer won the Suzanne Animation award, congrats dude!

[nggallery id=22]

The presentation had an unexpected benefit; it introduced the project to new contributors- Thanks Tal 🙂

Sadly I missed some people- Malefico has too many conferences on his plate to make it to Blender conference this year, and I was too swamped to meet up with Stani, Python coder and artist extraordinaire.

Finally, I had the honor of working for a bit on Andy and Eva’s awesome stopmotion animation project- Omega– which has some CG elements. I spent a large part of Monday (the day after the conference) rigging an amazingly designed and detailed character Andy built for the movie.

Big thanks to Ton, Anja, Anna, Nathan and everyone who made the conference possible and enjoyable.

Modeling the Train, with Automatic Baking

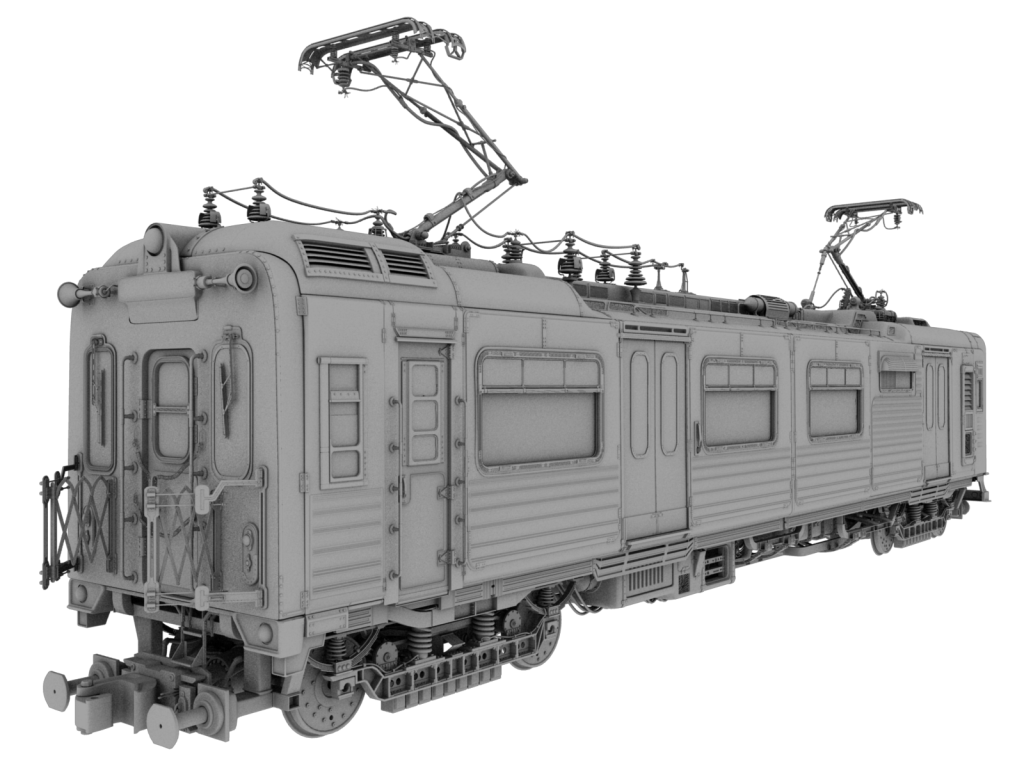
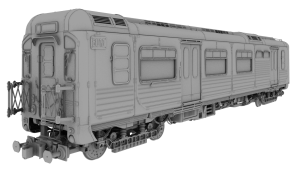
In between bouts of python coding I’ve been working on the model for the train and carriages. The model is asymmetric and modular so in theory loads of variations could be created by combining bits from the two models shown below.  The two ends of each train are different, as are the pantographs and all […]

In between bouts of python coding I’ve been working on the model for the train and carriages. The model is asymmetric and modular so in theory loads of variations could be created by combining bits from the two models shown below.  The two ends of each train are different, as are the pantographs and all of the side panels.  The design is based on a mix of old NYC subway cars and Soviet-era Eastern European engines.  I built the model on top of an early design for the undercarriage which had been modeled by Jean-Sébastien Guillemette and Jarred de Beer.

The model for the train is currently very high poly as it will probably be used in a few close-up shots (these renders are all geometry – no texture normal/bump maps!).  There’s a bit of work still left to do (naming 3000 objects and parenting them in a nice ordered heirarchy for one!) and making a low poly version, not to mention further tweaking of the design and rigging the moving parts!  To make the low poly version lots of the objects can simply be moved to a hidden layer (or excluded from the ‘HI’ group – we use group instances to bring models into scene files), but many of the meshes need to be split up into smaller parts so that the smaller parts can be excluded from the low poly renders – for example we need to move the rivets out of the body panel meshes as they will be so small in many of the long shots they won’t be noticeable – even at 2K!

For continuity’s sake we need to make sure the rivets are in the same place in the high and low poly versions.  To save the texture painters some time later down the pipeline I’ve written a script which goes through every object in the mesh and separates the details from the main lower poly mesh component (I can define these using vertex groups etc) and then bakes the details’ AO ‘shadow’ onto the lower poly part of the mesh and saves the texture in a maps file.  The script also intelligently names all of these textures in case links get broken up as the SVN gets reorganized over time.  For example if the script finds an object called ‘side_door’ it will split the object into ‘LOW0001side_door’ (for low poly) and ‘DET0001side_door’ (for details) and then bake out the AO to an image called ‘IMG0001side_door’ while making sure that all the meshes stay linked to save memory (rendering without any textures is already taking up over 2GB of memory).

Unlike the normal P-key behaviour, the script makes sure that separating meshes affects all the linked duplicates, not just one of them.  The numerical prefix helps identify one specific detail mesh with its corresponding specific lower poly mesh.  For example if there are 5 duplicates of ‘side_door’ (‘side_door.001’,’side_door.002’…), the first will be renamed ‘LOW0001side_door’ with its details saved in ‘DET0001side_door’, the second will be renamed ‘LOW0002side_door’ and its details saved in ‘DET0002side_door’ and so on, so future ‘tubers’ to work on the model won’t have to spend hours searching the outliner list to find the right object!  The reason the number is at the start and not the end of the name is to stop blender messing with the numbers, and to help sorting in an alphabetized list!

Fingers crossed there won’t be any surprising bugs in the script, as baking out 1000 unique meshes is likely to take some time and we haven’t written a resume function for the script yet!

Rigging Goodie: Armature Layer Names

Just a small utility I’ve been using to make my life easier, a little addon that lets you assign names to layers in an armature and hide/unhide them in the 3D View Properties area. Download it here, unpack then install via the add-ons area in user preferences. Works on current SVN (and the soon-to-come beta […]

Just a small utility I’ve been using to make my life easier, a little addon that lets you assign names to layers in an armature and hide/unhide them in the 3D View Properties area. Download it here, unpack then install via the add-ons area in user preferences. Works on current SVN (and the soon-to-come beta hopefully)

There’s also a ‘hidden’ operator you can use in the 3d view (search for change bone name layer) that allows you to switch selected bones to a named layer.  It’s a bit rough, but the panel at least beats having to hunt and peck one of those 32 nondescript little buttons 🙂

This isn’t really part of the gilgamesh rig, just a utility I’ve been using while rigging. The final UI (you can see a peak of it just under the layers in the screenie) has hardcoded layer names, and only those that are relevant to animation.

©URCHIN 2015