A Quick Python Time-saver

Just a very quick post to share some speed-ups we’re using in the studio.  Some of you may have noticed that blender 2.5’s UI is missing its bevel weight options from 2.49.  Luckily all the bevel weights are editable in python.  We’ve coded this quick add-on to bring back the missing functionality (which you can […]

Just a very quick post to share some speed-ups we’re using in the studio.  Some of you may have noticed that blender 2.5’s UI is missing its bevel weight options from 2.49.  Luckily all the bevel weights are editable in python.  We’ve coded this quick add-on to bring back the missing functionality (which you can install from the user preferences add-on tab [remember to enable it] or run from a blender text window).

EDIT: Updated yet again for 2.55 (thanks for the comments below – sorry for sluggishness on my part!)

http://www.pasteall.org/17726/python

After you’ve installed the add-on tab into edit mode and hit spacebar and type ‘Bevel’ and you’ll see the three functions.  Remember to add a bevel modifier and set it to ‘weights’ mode.

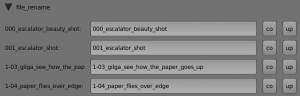
We’ve also been using Richard Olsson’s Batch Renamer to help keep scenes organised.  If you add a custom keybinding to it then there’s no more copying and pasting into the buttons window.

That’s all for now,  I’ll blog again soon with some of the models I’ve been working on!

Josh

Edit: Nathan Letwory (AKA Jesterking) made a nice tutorial video about this on youtube:

Across the Pond

Hello Everyone, I’m Josh, one of new crew members for tube.  I travelled over to the US from England last week, and I’m here until mid September undertaking cultural studies, and working on the models for the film.  While I attempt to mediate transatlantic differences (such as introducing the rest of the team to Branston […]

Hello Everyone,

I’m Josh, one of new crew members for tube.  I travelled over to the US from England last week, and I’m here until mid September undertaking cultural studies, and working on the models for the film.  While I attempt to mediate transatlantic differences (such as introducing the rest of the team to Branston Pickle and Marmite, explaining the etymology of ‘bangers and mash’, and justifying why I need a knitted cosy for my teapot), my hosts are offering an American exchange programme complete with drive-in movies, fried dough, Independence Day Celebrations and Root Beer.  In my time away from the screen I’ve been out enjoying the fresh air, beautiful countryside and very un-British weather.  I’ve been running to and from work each day (8 ½ miles each way), and when I had a few hours to spare last weekend I biked up to the Sugarloaf Mountain.

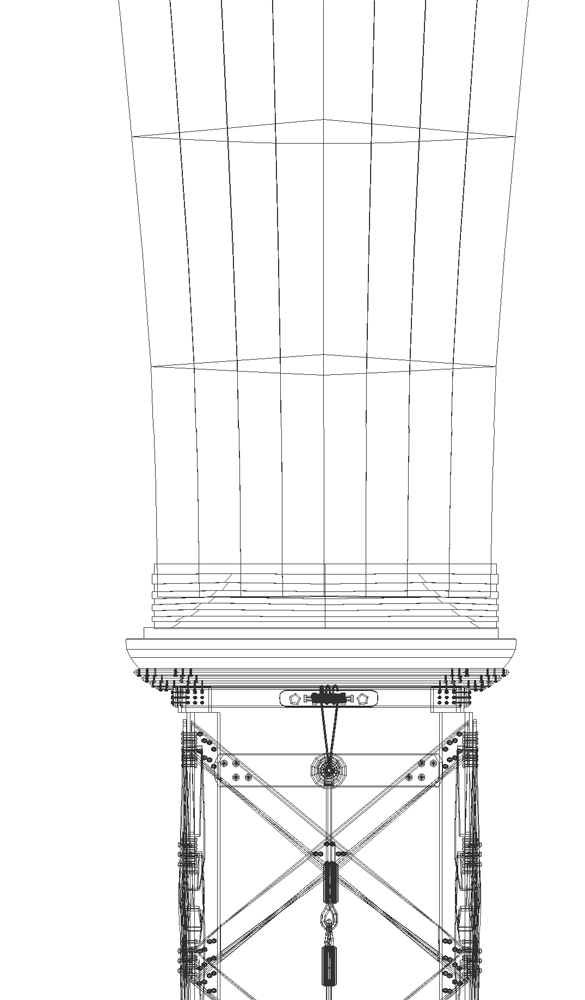
Fresh out of finishing a long and traumatic Architecture degree at Cambridge University, I vowed never to work in the industry again.  My first task in the studio, however, was to design the station roof and columns, and to provide general advice to the rest of the team on all things architectural!  Being British, and naturally strongly resistant to change, I was slightly thrown when I realised the team was working with up to the minute svn builds of Blender.  Back home in my own work I’d been hanging on to the 2.49 vintage with its historical interface not unlike the quirky 400 year old tumbledown cottage I lived in at uni.  2.5 comes with its own breed of glossy newness, an impersonal homogeneity with other 3D apps akin to the monotony of the skyscrapers in downtown LA and a feature set which sprawls on and on like the city-edge of Phoenix, Arizona.

Bewildered at first, I was tempted away from the path of the righteous by the glowing red devil’s tail of Maya on one side and the swirling captivating vortex of 3DS on the other, but eventually I found my way through the valley of darkness.  I still miss many of the 2.49 features which haven’t yet been ported – skinning loops and multi-knife-cuts to name a few, and in my first few days I’ve spent a considerable amount of time filing bug reports, hopefully for the greater good.

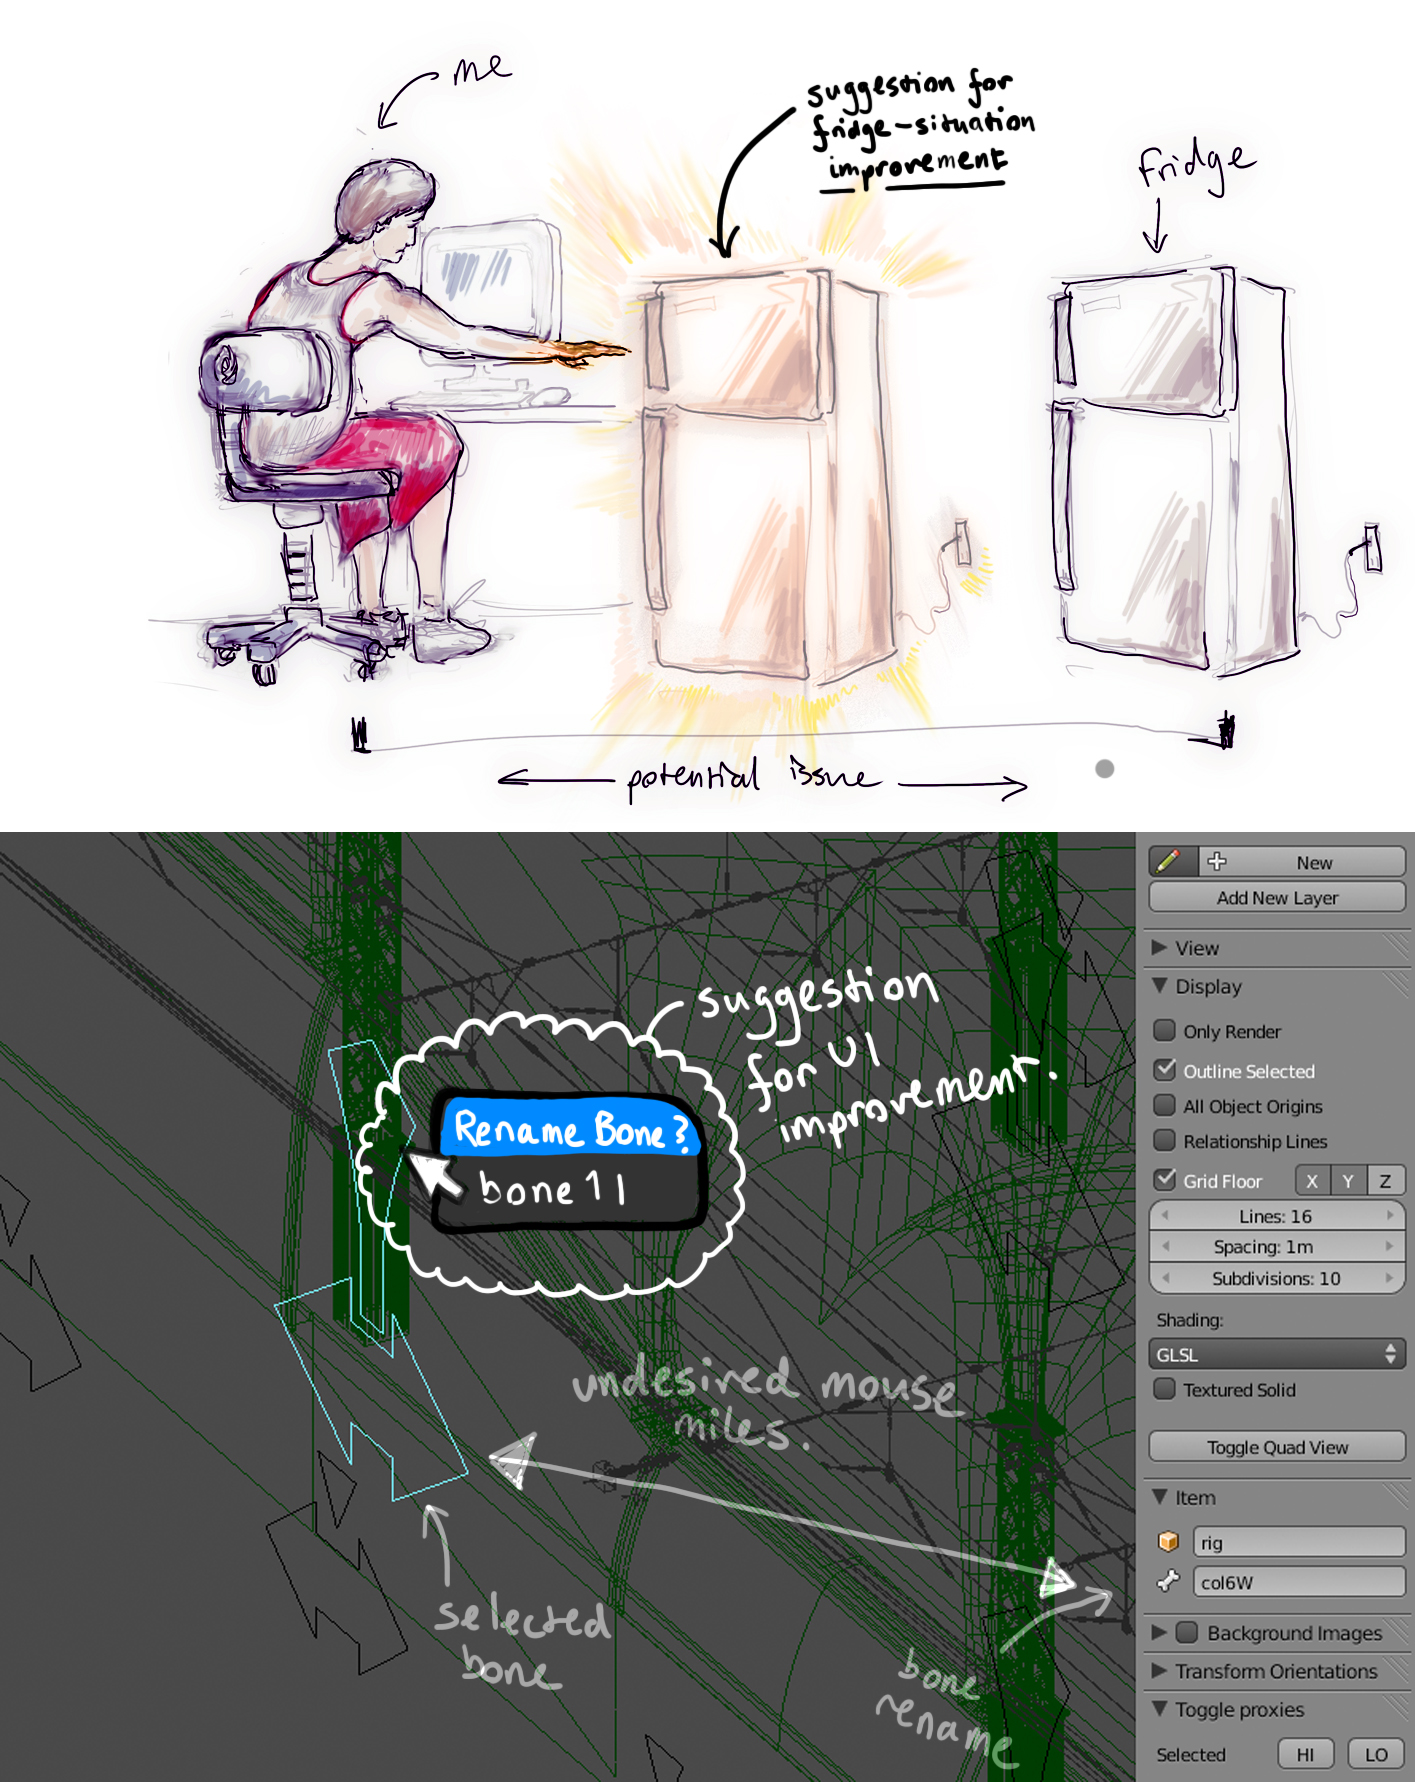
There are still some very simple features I wish had been integrated into the new release.  As what Pirsig might call a ‘mechanic of the photographic mind school’, all of my previous organisation and labelling systems have been tainted with a certain amount of… dyslexic logic.  To make life easier for everyone else on the project I have to name every object, bone, group and file according to a strictly prescribed style, not least so our python automation knows what’s going on!  While I don’t mind accumulating road miles on my way to and from Amherst every day, I hate the unnecessary mouse miles blender’s UI demands.  I’ve illustrated one of the key issues (which could be solved by a simple hotkey and under-mouse-dialog) using an analogy that will be familiar even to non-blender users.

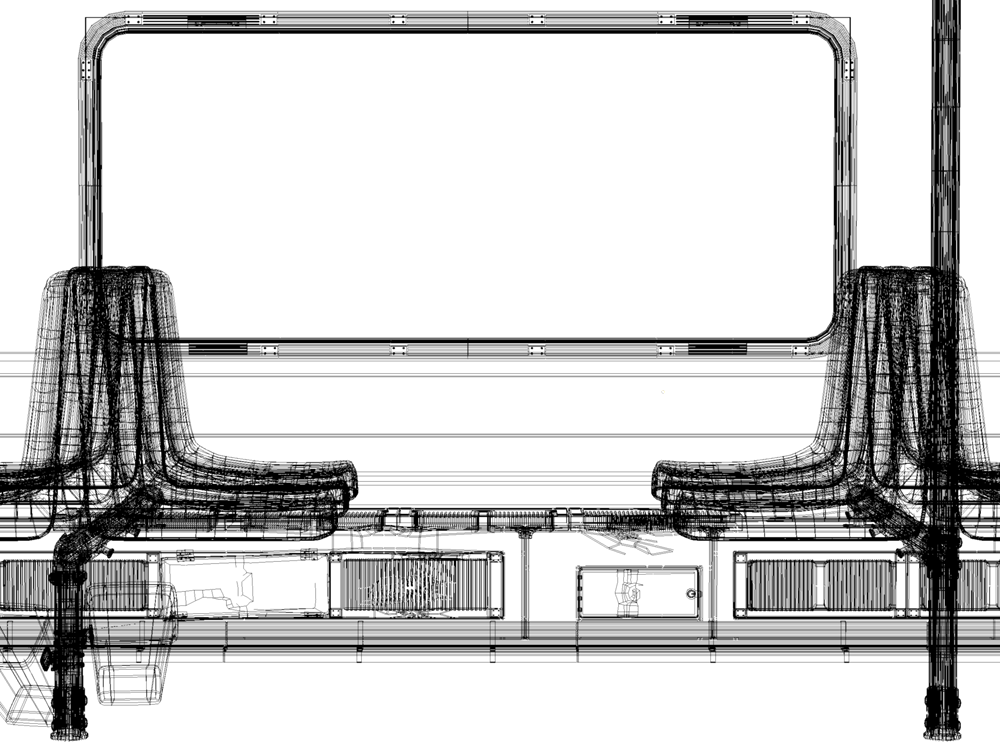
After breaking free from summers spent as a CAD-monkey in local architecture firms, I now find myself pining for the logical and consistent snapping and tracking systems I was so familiar with from hours spent in front of Rhino, Vectorworks, AutoCAD and the like.  At least the resulting ‘errors’ present in my incapable use of Blender’s snaps often results in a more derelict and aged look!  Here’s a work-in-progress snapshot of the interior of the train which I’ve been working on today, by virtually bashing it up:

That’s all for now,

Josh

A happy post

Hi everyone, I am Becky!!!!!    I am a Hampshire College student and I come from Guangzhou, China. My first summer in the States is actually pretty cool! We work hard during the day, but also hang out after work: movies, “swimming”, parties, and frozen yogurt of course.  😀 Since the beginning of summer, I’ve […]

Hi everyone,

I am Becky!!!!!    I am a Hampshire College student and I come from Guangzhou, China. My first summer in the States is actually pretty cool! We work hard during the day, but also hang out after work: movies, “swimming”, parties, and frozen yogurt of course.  😀

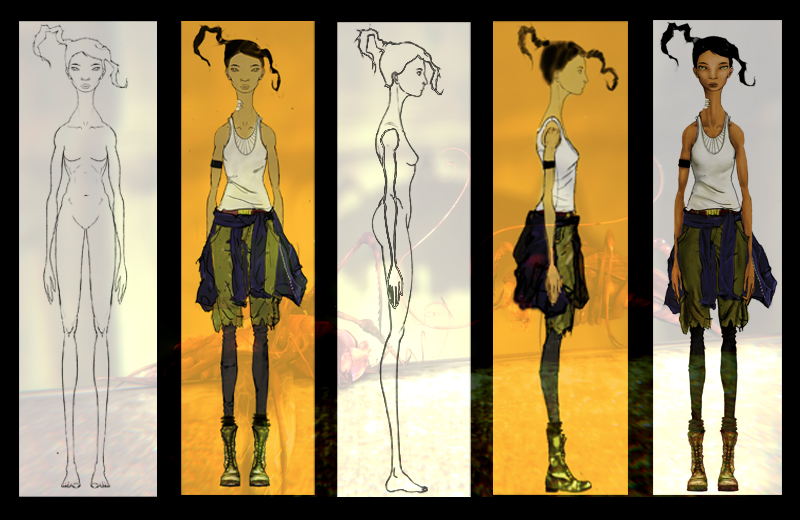
Since the beginning of summer, I’ve been working on some concept art and animatics . It is exciting to experience how initial ideas develop to fruition, which includes lots of contribution from different intellectuals. For quite a while, we have been tweaking our main character Gilgamesh’ s model sheet, to make it awesome for 3D modeling. I also have been working on Gilgamesh’s clothing design with Fateh and Redo(from Argentina)!   So finally, here we go! Check out our Gilgamesh. 😛

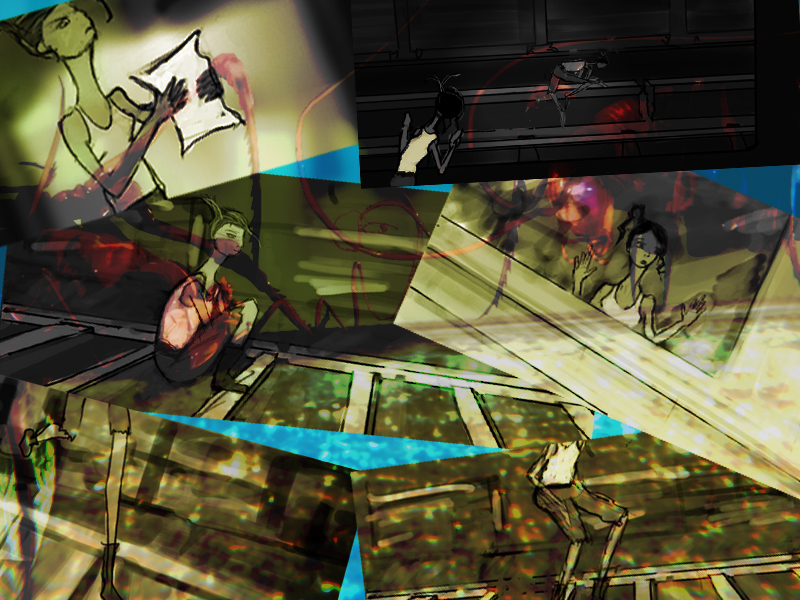
And, here are some of the animatics that I have been working on lately.

And Soon we will be moving on to creating the animatics for time lapse sequences and other concepts. Yay!

So hot today,I almost melted.   o_O||

So, stay cool, guys!!    😛

Bye !!!!

Bonjour a tous !

Hi everybody, First, let me introduce myself, I’m Henri Hebeisen from France and I’ll work as a 3d intern for the two months. 🙂 I arrived last week after a long plane trip, so I`m still discovering the `american way of live`.Living here seems really great! 😀 I’ve been working on the  project for less […]

Hi everybody,

First, let me introduce myself, I’m Henri Hebeisen from France and I’ll work as a 3d intern for the two months. 🙂 I arrived last week after a long plane trip, so I`m still discovering the `american way of live`.Living here seems really great! 😀

I’ve been working on the  project for less than one week now and it’s very exciting to work on it. Everybody is really nice and that’s a pleasure to work here. Bassam showed the animatic last friday, the story is just…incredible!!The final result will be “epic”! (a popular word for blenderheads these times 😀 )

So my first task here was to do some tests for a shot Bassam had in mind. The idea was to play with the curves of the metro rail and have nice shapes when the camera is flying over really fast. So as we wanted to have the impression of movement really early, I just did some basic drawings with Inkscape and then projected these drawings on planes in blender.

Using Inkscape was quite useful because it allowed me to do several variations of the curvy tracks fairly fastly, just had to play with layers and positioning curves and

And then back to blender, it became very easy to position the camera, control the speed and so on… 😀 Here is a picture of what it looks like in blender :

As you can see, it’s very simple and it’s a good way to visualize the curves in movement.

Once we had a strong idea of what the shot would look like, I started to model the tracks in 3d and made them fit it with the inkscape drawings. Et voila, that’s it!

2010/06/test0001_0235

Making a ‘Make Movie’ Button, Part 1

Pre-production Pipeline Even during pre-production, a project can rapidly become a mess if you are not careful. In this phase, the assets to manage are: script (for us, a Celtx project) breakdown ( a document with shot by shot list for the movie) storyboard images – one per shot, in our case typically done in […]
Pre-production Pipeline

Even during pre-production, a project can rapidly become a mess if you are not careful. In this phase, the assets to manage are:

  • script (for us, a Celtx project)
  • breakdown ( a document with shot by shot list for the movie)
  • storyboard images – one per shot, in our case typically done in Gimp
  • animatic – usually generated from modified storyboard images, but sometimes from .blend or other files, the animatic is a draft of the movie with minimal animation (camera anim, few in-betweens per shot, etc).

moving into production, we also need to manage:

  • shot file or files
  • production reference library
  • production edit

Adding a shot can be an ad-hoc process: assign it a name and number in the breakdown, make a storyboard image, then work on any number of source gimp and blender files to generate some .pngs or .avis that are finally referenced in the sequencer. Rinse and repeat, and you end up with hundreds of disorganized files, touching any of which will break the animatic edit–a situation far from ideal.

Organization

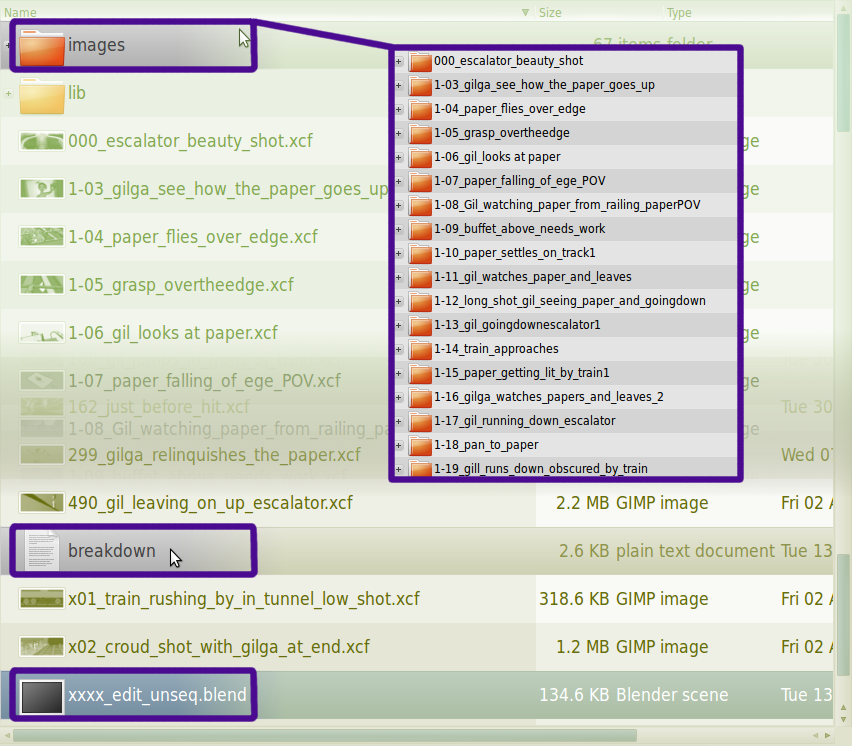
If you look at Jarred’s earlier post , you can see the beginnings of the solution. We had some issues from using a patched Blender and were still looking at a lot of manual work to add a shot into the production. Most of these problems we solved with a slight re-organization of the preproduction directory:
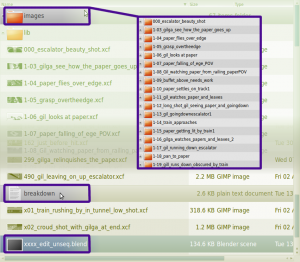

As you can see, the main folder contains source files (which should eventually be moved to their own subfolder), the breakdown and the edit. The source files generate the shots: all their filenames begin with xxx_yyyyyy, where xxx is the shot number, and yyyyyy is the short description from the breakdown. These are all checked into SVN. A subfolder called images/ contains various subfolders, one per shot, with the name xxx_yyyyyy. These contain every image, image sequence, movie or other file that is referenced by the edit.

Now we no longer need a modified Blender, since we don’t need to edit the names of the image files, just their paths.

Introducing Geppetto

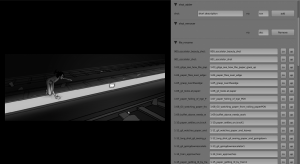
The next step towards improving anything is coming up with a cool name. To wit, ‘sequence_add_and_rename_shots.py — our former Python script for resequencing shots — becomes Geppetto, for the puppet master himself.
Ordering the Edit
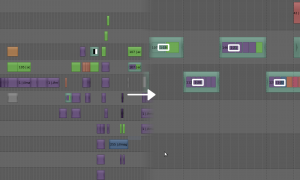
Now our directories were organized, but the edit looked a mess! it would be nice to have each shot as a strip, not a collection of strips and effects. So we used Blender’s metastrip feature, which basically allows you to encapsulate any collection of related strips in the sequencer (strips in Blender are like clips in other editors) with one ‘metastrip’ – kinda like a strip folder. We gave each of these the name xxx (the shot number)- now when you look at the edit from the top view, all you see is shots, not the layering of all the background, foreground, etc. elements coupled with effects and transforms to make them move.

Hooking it into Geppetto

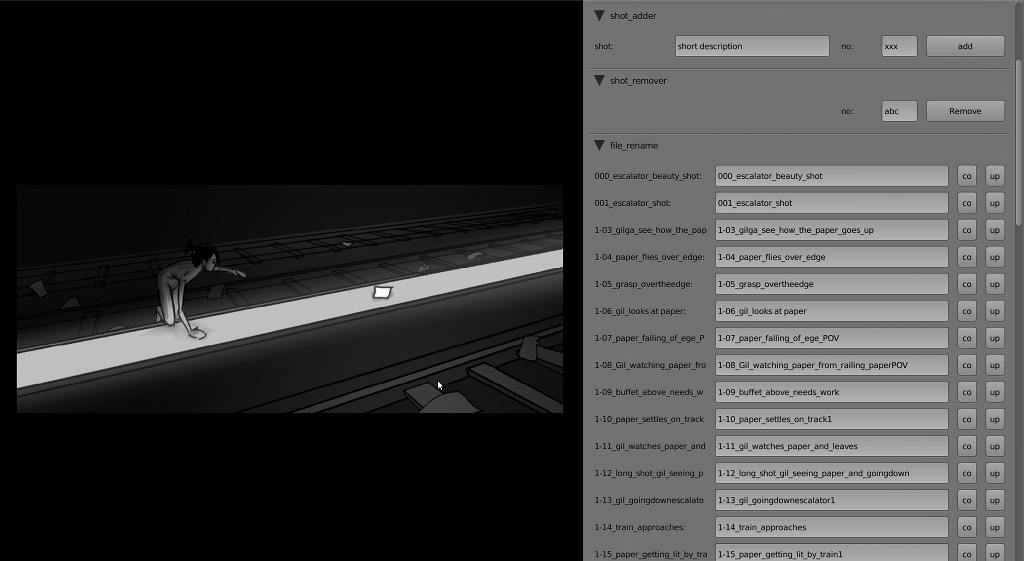
All this organization makes things easy to automate. Geppetto currently provides an:

  • ‘Add Shot’ Button which lets you type in the shot number and name and then does the following:

    1. Adds the shot to the breakdown (you no longer edit the breakdown by hand, but use Geppetto instead)
    2. Creates a source .xcf file with the name xxx_yyyyy.xcf , adds, and commits to svn
    3. Creates a folder of the name xxx_yyyyy in images/ and makes a .png single frame in it
    4. Links the image into the sequence editor as a strip at the current frame position
    5. Encapsulates the image into a meta strip with the name xxx
  • ‘Remove Shot’ Button: basically lets you type in which shot to remove , and takes it out of svn, the edit, the breakdown, everywhere. The files go to a junk folder so you don’t lose it for good.

  • Shot List, with each shot getting:
    1. A text field you can edit to change the shot number
    2. A commit button to push your change to svn and the edit – basically this is for the editor/director to resequence a shot, or (not implemented yet) change the shot description refer to Jarred’s post for details
    3. An update button to update Svn and get new shot images in. Basically, if you or someone else changed the source .xcf for a shot, this gets those changes in automatically – details upcoming in part 2!

And finally, Jarred has made a prototype of the next feature, not yet rolled into the main code (drumroll, please): stay tuned for the ‘Make Movie’ Button in part 3! 🙂


©URCHIN 2015