Crowd Simulation and Auto-walking

Hey everyone, this is my first post since I’ve been back in England!  In these dark depths of winter I really miss the summer I spent over in the US as a Bit Films intern; nice weather, good food, great crew.  Since leaving the states I’ve been hard at work at college, and on various […]

Hey everyone, this is my first post since I’ve been back in England!  In these dark depths of winter I really miss the summer I spent over in the US as a Bit Films intern; nice weather, good food, great crew.  Since leaving the states I’ve been hard at work at college, and on various other projects, but now and again I get enough free time to work on Tube.  Something which has been on my to-do list since B-Conf is feasibility tests for crowd simulation and auto-walking, and combinations of the two.  

I’ve always struggled to set up Blender’s boids sim exactly how I needed it for ground based creatures (trying hard not to give anything away about the film here!), especially in the case of collision critical simulations when its important that two bodies don’t get tangled up together.  Coupled with this I know that for Tube we will need more direct control over the ‘boids’ and being able to explicitly direct them and override the ‘boid brain’ is a must.  On top of that we need more than just fly, walk and sleep actions.  It seemed that rather than trying to strap something on the back of Blender’s built in boids, it might be easier to code something more specific (and more limited in scope) for a few scenes we have to animate, so I started out on a now heavily WIP crowd sim.

There used to be an auto-walker script for blender 2.4x.  I came up with my own algorithm before finding it, but did end up mimicking a few of the features (leg sequencing for one) though my implementation had to be completely different because of the way the rest of my code works.  It only walks, as such, not runs, yet…

A couple of weeks ago I tested out the code and rendered a couple of demo crowd shots.  Then I got completely carried away and implemented a few special effects using PIL and the ‘scribbler’ algorithm, and generated sound from the fcurves of hundreds of marching spiders.  The project uncovered a few pitfalls and some more work still to do before the crowd sim is production ready, but enough of the worrying, here’s a demo video!

“Spiders” auto-walking and flock simulation for blender from Josh Wedlake on Vimeo.

Here’s the video on youtube where the compression is slightly nicer at the larger sizes.

Modeling the Train, with Automatic Baking

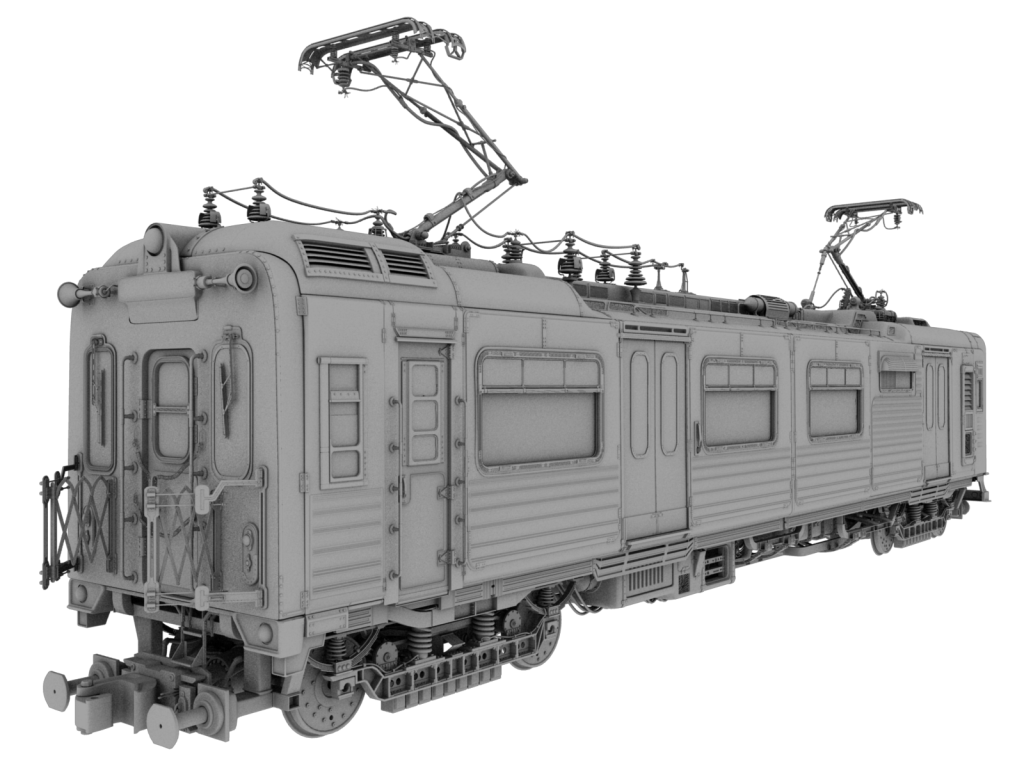
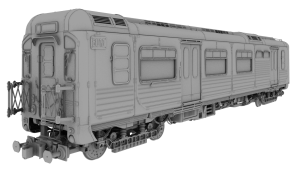
In between bouts of python coding I’ve been working on the model for the train and carriages. The model is asymmetric and modular so in theory loads of variations could be created by combining bits from the two models shown below.  The two ends of each train are different, as are the pantographs and all […]

In between bouts of python coding I’ve been working on the model for the train and carriages. The model is asymmetric and modular so in theory loads of variations could be created by combining bits from the two models shown below.  The two ends of each train are different, as are the pantographs and all of the side panels.  The design is based on a mix of old NYC subway cars and Soviet-era Eastern European engines.  I built the model on top of an early design for the undercarriage which had been modeled by Jean-Sébastien Guillemette and Jarred de Beer.

The model for the train is currently very high poly as it will probably be used in a few close-up shots (these renders are all geometry – no texture normal/bump maps!).  There’s a bit of work still left to do (naming 3000 objects and parenting them in a nice ordered heirarchy for one!) and making a low poly version, not to mention further tweaking of the design and rigging the moving parts!  To make the low poly version lots of the objects can simply be moved to a hidden layer (or excluded from the ‘HI’ group – we use group instances to bring models into scene files), but many of the meshes need to be split up into smaller parts so that the smaller parts can be excluded from the low poly renders – for example we need to move the rivets out of the body panel meshes as they will be so small in many of the long shots they won’t be noticeable – even at 2K!

For continuity’s sake we need to make sure the rivets are in the same place in the high and low poly versions.  To save the texture painters some time later down the pipeline I’ve written a script which goes through every object in the mesh and separates the details from the main lower poly mesh component (I can define these using vertex groups etc) and then bakes the details’ AO ‘shadow’ onto the lower poly part of the mesh and saves the texture in a maps file.  The script also intelligently names all of these textures in case links get broken up as the SVN gets reorganized over time.  For example if the script finds an object called ‘side_door’ it will split the object into ‘LOW0001side_door’ (for low poly) and ‘DET0001side_door’ (for details) and then bake out the AO to an image called ‘IMG0001side_door’ while making sure that all the meshes stay linked to save memory (rendering without any textures is already taking up over 2GB of memory).

Unlike the normal P-key behaviour, the script makes sure that separating meshes affects all the linked duplicates, not just one of them.  The numerical prefix helps identify one specific detail mesh with its corresponding specific lower poly mesh.  For example if there are 5 duplicates of ‘side_door’ (‘side_door.001’,’side_door.002’…), the first will be renamed ‘LOW0001side_door’ with its details saved in ‘DET0001side_door’, the second will be renamed ‘LOW0002side_door’ and its details saved in ‘DET0002side_door’ and so on, so future ‘tubers’ to work on the model won’t have to spend hours searching the outliner list to find the right object!  The reason the number is at the start and not the end of the name is to stop blender messing with the numbers, and to help sorting in an alphabetized list!

Fingers crossed there won’t be any surprising bugs in the script, as baking out 1000 unique meshes is likely to take some time and we haven’t written a resume function for the script yet!

Mushroomer Documentation Published

Thanks for all the positive feedback we’re had on the demo video! Due to the interest shown I’ve started a documentation wiki and written a substantial amount of info about the less-than-obvious features that are included.  Its more of a technical reference so everyone working on our project knows how to use the generator than […]

Thanks for all the positive feedback we’re had on the demo video! Due to the interest shown I’ve started a documentation wiki and written a substantial amount of info about the less-than-obvious features that are included.  Its more of a technical reference so everyone working on our project knows how to use the generator than a straightforward tutorial.  If anyone is interested in writing/screencasting a tutorial I’d be happy to offer help when I can!  We’ve also released an example blend file with a simple setup.

UPDATE: Documentation Wiki and latest available script version for r31856 [Fri Sep 10 16:54:53 CEST 2010]

[UPDATE] While the blender python API is constantly changing I’ll try to keep track of which releases of the Mushroomer work with which releases of blender on the wiki. If you have trouble getting the script to work first check your console for any kind of python errors. If there are any post them here. Check the documentation on the wiki and see if you’re doing anything wrong, and we’ll have a look and see if the script’s broken again!

while the cat is away…

So Bassam’s been away in Bulgaria for a couple of weeks and Henri and I mostly had the studio to ourselves.  I’ve been working on a mushroom generator for a couple of timelapses – not that tube will be filled with glowing mushrooms, more that we wanted something half way between the ivy generator and […]

So Bassam’s been away in Bulgaria for a couple of weeks and Henri and I mostly had the studio to ourselves.  I’ve been working on a mushroom generator for a couple of timelapses – not that tube will be filled with glowing mushrooms, more that we wanted something half way between the ivy generator and a fully fledged particle system.  Henri modeled some funky mushrooms and together we spun together a quick demo video just to show off some of the effects that are possible, and to exercise our fetish for indirect lighting and luminous pink.

Mushroom Generator Blender 2.5 from Henri Hebeisen and Josh Wedlake on Vimeo.

The script is still heavily in development but if you like alpha stuff and you’re happy to do your own debugging, then feel free to download and run.

UPDATE: Find the latest build here.
UPDATE: release 4 is fixed for r31856 [Fri Sep 10 16:54:53 CEST 2010]… don’t expect it to last long though!

Essentially you need to model a couple of mushrooms (just a generic term – you can model flowers or trees or robotic arms) with some shapes for their animation which will be blended sequentially, some shapes for random variation, some shapes in which they bend up the y axis, a painted vertex group for shrinkwrapping the base of the mushroom, all scaling and rotation applied and the origin at the base of the mesh.

above: creating the shapes for auto animation

above: adding manual animation to a mushroom

You also need a target mesh which has nice topo (ideally no elongated tris or nasty convex quads), optionally painted vertex groups named OBmymushroomname… and MAmymushroommaterial… to control the distribution of your various materials and different object types, optionally a limit vertex group (ie only faces within this will receive mushrooms), and a lot of patience.  Select the mushrooms then make the target active and tab into edit mode, select the start face(s) then hit spacebar>Mushroomer (remembered to run the script first).

above: mission control, godspeed

Adjust the settings and hit go.  I suggest you run blender from the terminal so you can watch for progress and any hangups.  You might well want to abort if it starts slowing right down from too many mushrooms.

above: when its done

Development on this script has been a bit of a nightmare.  Currently it is not possible to create multiple linked objects and have different shape key and material animation blocks on them without having to duplicate the mesh and/or material blocks (thus unnecessarily eating up huge amount of memory and removing the possibility to edit the mesh for one mushroom and have all of the update).  This is in the blender bug tracker as #23546 and #23547.  If they get fixed you can uncomment the deep data path keyframe adding and enable all the code for migrating actions to object level.  Another limitation which slowed development is that it is currently not possible to merge two actions into one.  This is necessary if you are moving mesh level and material level animation data back to object level.  Essentially you need to combine two actions into one.  Not only is this not possible, but its also not possible to copy an fcurve in its entirity, but rather python has to iterate through very slowly copying every handle one by one, and even this is susceptible to some bugs (not yet reported).  This is because the collection of fcurves is read only even though each fcurve itself if read/write.  I was also held up by bug #23532 which prevented me from doing the action block combining in the NLA editor, and for a short while by bug #23548 which caused blender to crash when creating new fcurves.  Finally the script can’t currently support animation data on the mushrooms’ materials due to bugs #23593 and #23594 [UPDATE Campbell fixed these, great news! Material & texture animations are now supported!] – I’ve chosen to block this feature rather than risk an inescapable hang and data loss – uncomment those lines at your own risk!  Fingers crossed the devs will iron these out sooner or later and the mushroom generator will be running faster, with lower memory requirements, smaller file sizes and more stability!

Its also been a sad day today as we waved goodbye to Henri who is on his way back to France as I write.  Its been great fun working together for the last 2 months.  Luckily we’ll only be a stones throw apart when we’re back at our separate homes in Toulouse and London.  If all goes well we’ll be at the Blender conference this October as well.  Rest assured, the world hasn’t seen the end of the glowing mushrooms saga – I’m hope we’ll have another chance to work together soon!
some quick concepts…

Been meaning to post these for ages… from 4 or 5 weeks ago… I’ve been modeling the train on and off when I’ve not been pythoning – don’t want to give too much away now, just to say that the model is going to be very high poly.  Most of the details are now complete […]

Been meaning to post these for ages… from 4 or 5 weeks ago…

I’ve been modeling the train on and off when I’ve not been pythoning – don’t want to give too much away now, just to say that the model is going to be very high poly.  Most of the details are now complete but I still have all the big panels to go.  I’ve built a low(ish) poly base mesh which all of the details will be deformed to (using shrinkwrapped 2D lattices).  All of the side panels are modular so we can swap around the order for variations etc.  Thoughts gladly received.

©URCHIN 2015