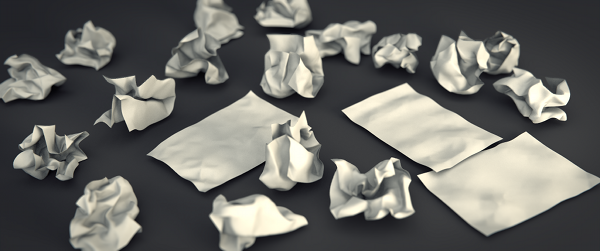
Been making some extra crumpled paper for one of the trickier shots in the movie, and thought the method was amusing enough to post here.
- create a rectangular paper grid, and triangulate it.
- make a slightly bent shape and pin it.
- create a ground plane, with collisions turned on
- add a softbody modifier, rotate the grid, position it above the ground
- hit alt-a, let softbody do it’s magic
- apply the modifier as shape
- create new, successively folded shapes by repeating the previous 3 steps
- sculpt your softbody shapes to perfection
- uv unwrap
- split out each shape into a mesh of it’s own
- create edge creases, merge quads, etc.
- add subsurf/other modifiers as needed


Hmm, if it had some images to go with some of the vague steps then this would be a good tip.
Vague steps.
make a slightly bent shape and pin it. (pin where, anywhere? one or more points?)
add a softbody modifier, rotate the grid, position it above the ground(the paper or the ground plane? helps to keep consistent naming)
A video would be nice and very didactic
Nice and sweet, thanks Bassam!
thank damir!
wasa: ‘pin’ refers to the shape, of course, so it stays on. you could also turn the slider to 1.
sorry it seems vague, it’s not so much a tutorial as sharing a neat technique among blenderheads, so it assumes a lot of familiarity. would you like a proper tutorial on this topic? It seems Gen X would!
Ah I see one thing I did that confused me. I mixed up softbody with cloth. (getting over cold, little hard to think straight)
I’d love to see a tutorial, creating convincing wadded paper I’ve seen asked a few times. Usually the answers are much more complex and time consuming than what you guys appear to have here.
hmm…
looks like a tissue 🙂
Seems like a neat technique.. Would be great with a few images to go with the tutorial..
Tried it and it works perfectly.
Thanks for this tip.
Just one note, the grid of paper should stick a bit through the collision plane. Once you see the effect you know how to continue.
CNikiel, glad it worked for you! I’ll see about doing a more detailed tutorial for the rest.
t0m0, it’s kind of half way right now: tissue has softer bends and makes tighter curves, what you see really close to my referece. The only thing needed is one more level of subdiv (to get closer to the creases) a crumple texture on bump or maybe slight displacement, and to remove the solidify modifier (it is too thick, you wouldn’t really see the edges on real paper)
I don’t get this. The paper is just jumping up and down for me…
Guess you should publish the settings you are using – maybe a video for this is pure guessing.
video tutorial coming up!
Nice to hear that, Bassam. 🙂
Raimon
Wow! Why didn’t I think of that! Thanks, Bassam. 😉
-Reyn